In-Ground Fencing
Freedom to Run. Just Only so Far.Trusted for over two decades, the SportDOG® Brand In-Ground Fence™ systems are a reliable, cost-effective alternative to traditional fencing. Designed for sporting breeds, these fences have the features needed to give your dog freedom to run, just only so far.

Containment Area
Kits cover 1 1/3 acre; expandable to contain 100 acres

Three Stim Types
Tone/vibe warning with multiple static stimulation levels

Unlimited Dogs
One collar included; expandable to contain multiple dogs

Waterproof Design
Collars perform in any weather with waterproof technology
How It Works
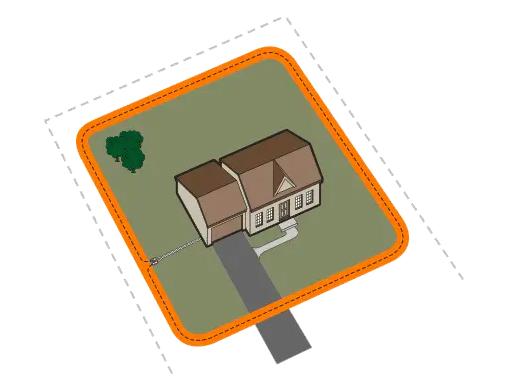
The system works by producing a radio signal from the Fence Transmitter through the Boundary Wire. Bury the Boundary Wire to enclose the dog's Boundary Area. Temporarily define the Boundary Area with Boundary Flags for a visual aid in training your dog. Your dog wears a Collar Receiver with Contact Points that touch his neck and, once trained, can roam freely in the Boundary Area. When your dog reaches the Warning Zone, the Collar Receiver gives a warning beep and vibration. If your dog continues into the Stimulation Zone, a safe static stimulation will be delivered through the Contact Points to get his attention until he returns to the Boundary Area.

Installation
Installing an In-Ground Fence™ system is an easy weekend project.
- Plan your layout
- Lay out wire and test before burying
- Bury wire a few inches in the ground
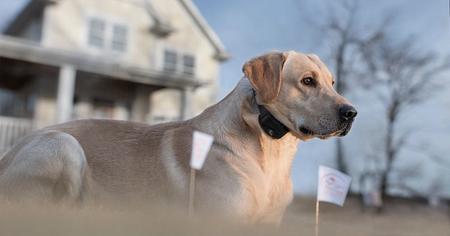
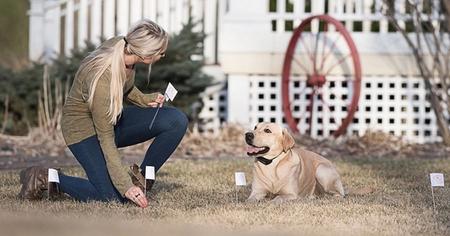
- Place flags at edge of warning zone
- Find the correct level of static stimulation for your dog
- Train your dog in short sessions during the next 2 weeks
Skills and tools required: Installation involves simple handiwork with basic yard tools. You’ll be burying wire at a very shallow depth, possibly splicing wire, and patching the surface along the perimeter.
Important Tips:
- The Boundary Wire MUST start at the Fence Transmitter and make a continuous loop back.
- Always use gradual turns at the corners to produce a more consistent boundary. Do not use sharp turns, as this will cause gaps in your boundary.
- We recommend setting a Boundary Width for the Warning and Stimulation Zones to approximately 16 - 24 feet (8 - 12 feet on each side of the wire).
- The Collar Receiver can be activated inside the house if the Boundary Wire runs along the outside wall of the house. If this occurs you can remove your dog’s Collar Receiver before bringing him inside, decrease the range using the Range Adjuster, or consider an alternative layout.
Custom Layouts
Simple Perimeter (Single Loop)
The Perimeter Loop is the most common layout. This will allow your dog to freely and safely roam your entire property
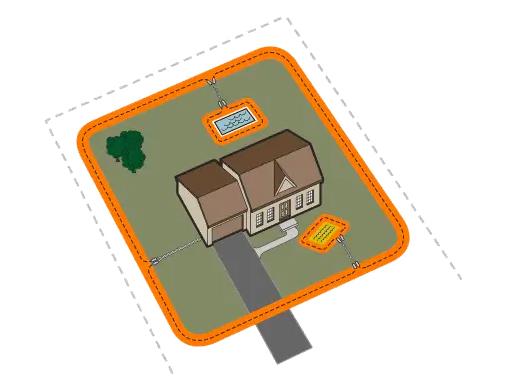
Exclusion Areas
By running the wire from the perimeter, around an area you want to restrict your dog’s access to, and back to the perimeter (twisting the wire on the way back) you can protect areas such as gardens, pools and landscaping.
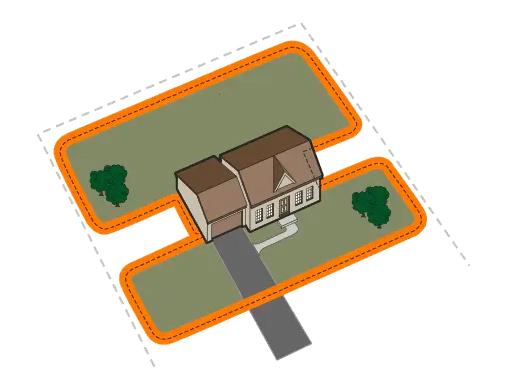
Separate Front and Back Yard Layout
By running the wire close to the sides of the house, you can provide two separate areas for your dog to be contained. This stops your dog from moving from the back yard to the front yard, or vice versa.
Double Loop
A Double Loop must be used when you are not establishing the Boundary Area on all sides of your property. For example, this type of boundary works well with an existing fence or to provide lake/dock access.
When using a Double Loop, the Boundary Wire must be separated by a minimum of THREE TO FIVE FEET to avoid canceling the signal. Remember that a Double Loop will require twice as much wire

Training Info
• Introduction to Training
• Training Day 1- Boundary Flag Awareness
• Training Days 2-4- Continue Boundary Flag Awareness
• Training Days 5-8- Distraction Phase
• Training Days 9-14- Unleashed Supervision
• Training Days 15-30- Monitoring Your Dog
RELATED ARTICLES