


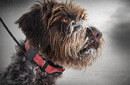

How do I change the collar colour or add dog colours for other dogs?
The MY DOGS screen allows you to add or remove dogs assigned to the Handheld Device. It helps track which dog is wearing which collar and defines collar settings specific to that dog.
TO ADD A DOG:
- From the main menu, select SETTINGS > MY DOGS > ADD A DOG. A screen labeled DOG n appears where n is the next available number of the dog.
- Change the dog’s name by selecting CHANGE NAME. A text entry screen displays. Press the arrow keys to select Clr and press the tracking/training toggle button to clear the name. Pressing the arrow keys select letters to enter a new name. Select to complete the new name.
- Assign a collar to this dog by selecting COLLAR. Use the arrow keys to select the colour matching the desired collar.
- Once a collar is assigned to the new dog, you are ready to track/train this dog. Press BACK to return to the main menu.
TO CHANGE A DOG’S NAME:
- From the main menu, select SETTINGS > MY DOGS > dog > CHANGE NAME where dog is the name previously entered for this dog. A text entry screen displays.
- Press the arrow keys to select Clr and press the tracking/training toggle button to clear the name.
- Press the arrow keys on the Menu Navigation Pad to enter a new name, if desired.
- When finished, select Enter.
TO ENABLE OR DISABLE E-COLLAR MODULE:
The E-COLLAR setting allows you to enable (or disable) the E-Collar Module to deliver stimulation, vibration and/or a tone for correcting this particular dog.
- From the main menu, select SETTINGS > MY DOGS > dog where dog is the name of the dog.
- Select E-COLLAR and use the right arrow key to select Y to enable, or N to disable stimulations for this dog. NOTE: This setting only applies to this dog when wearing this collar.
- When finished, press BACK to return to the main menu.
TO CHANGE STIM BUTTONS SETTINGS FOR A DOG:
The STIM BUTTONS setting allows you to assign the type of stimulation for each STIM button according to your training preferences for this particular dog. The buttons are labeled Button 1 (top), Button 2 (middle), and Button 3 (bottom).
NOTE: This setting only applies to this specific dog.
- From the main menu, select SETTINGS > MY DOGS > dog where dog is the name of the dog.
- Select STIM BUTTONS. The STIM BUTTONS screen displays.
- Press the up or down arrow to select BUTTON 1.
- Press the right arrow to select C (continuous), T (tone), V (vibration), M (momentary), R (rising), P1 (programmable 1), or P2 (programmable 2). Default for Button 1 is C.
- Press the up or down arrow to select BUTTON 2.
- Press the right arrow to select C (continuous), T (tone), V (vibration), M (momentary), R (rising), P1 (programmable 1), or P2 (programmable 2). Default for Button 2 is T.
- Press the up or down arrow to select BUTTON 3.
- Press the right arrow to select C (continuous), T (tone), V (vibration), M (momentary), R (rising), P1 (programmable 1), or P2 (programmable 2). Default for Button 3 is V.
- When finished, press BACK to return to the main menu.
TO SET PROGRAMMABLE STIM LEVEL FOR A DOG:
NOTE: This setting only applies to this specific dog.
- From the main menu, select SETTINGS > MY DOGS > dog where dog is the name of the dog.
- Select STIM BUTTONS. The STIM BUTTONS screen displays.
- Select P1 LEVEL and use the arrow keys to set the desired stimulation level.
- Select P2 LEVEL and use the arrow keys to set the desired stimulation level.
- When finished, press BACK to return to the main menu.
TO CHANGE STIM RANGE SETTINGS FOR A DOG:
The STIM RANGE setting allows you to set the stimulation range (low, medium or high) for a temperament of a specific dog. A dog with a mild temperament should have a low range while a stubborn dog may require a high range of stimulation. There are multiple levels available within each stimulation range. The default range setting is medium.
- From the main menu, select SETTINGS > MY DOGS > dog where dog is the name of the dog.
- Select STIM RANGE.
- Press the right arrow to select L (low), M (medium), or H (high) stimulation ranges.
- When finished, press BACK to return to the main menu.
TO CHANGE THE COLLAR ASSIGNED TO A DOG:
The COLLAR setting allows you to assign a collar to a specifi c dog according to the color set in the MY COLLARS screen. The color will also be used to identify the dog on the TRACKING/TRAINING screen.
- From the main menu, select SETTINGS > MY DOGS > dog where dog is the name of the dog.
- Select COLLAR.
- Press the arrow keys to select the colour for the desired collar then press the right arrow key. You must select YES to confirm the new collar assignment. NOTE: If the selected collar has already been assigned to a different dog, a warning message displays.
- When finished, press BACK to return to the main menu.
TO DELETE A DOG:
NOTE: Deleting a dog cannot be undone. All configuration settings related to this dog will be deleted.
- From the main menu, select SETTINGS > MY DOGS > dog where dog is the name of the dog to be deleted from the system.
- Press the arrow keys to select DELETE and press the right arrow key.
- A warning message displays. Select YES, if desired, to confirm.
