


Setup Step 1: Prepare the Handheld Transmitter
You must complete these steps prior to using this device for the first time.
TO CHARGE THE HANDHELD DEVICE:
NOTE: Approximate battery life between charges is 20 hours, depending on frequency of use.
- Lift the rubber cover protecting the charging jack.
- Connect one of the charger connectors to the charging jack.
- Plug the charger into a standard 120/240-volt AC wall outlet.
- Charge the Handheld Device for 2 hours.
- When charging is complete, indicated by a full green battery on the screen, replace the rubber cover.
Using Li-Ion technology, the Handheld Device only requires a 2 hour charge. It is not harmful to let the unit charge more than 2 hours.
TO TURN THE HANDHELD DEVICE ON:
On the top of the unit, firmly press and release the On/Off button. The start-up screen will display.
TO TURN THE HANDHELD DEVICE OFF:
Firmly press and hold the On/Off button until the display goes black.
TO ADJUST THE DISPLAY BRIGHTNESS:
The Handheld Device comes with brightness controls to allow you to adjust the backlight level for the optimum readability in the current environment. NOTE: Higher brightness levels will decrease battery life between charges.
With the Handheld Device powered on, press and release the On/Off button to increase/decrease brightness levels. There are 5 levels of brightness available. The Brightness Indicator will display the current level at the top of the display.
TO CALIBRATE THE COMPASS
In order for the TEK™ Series Handheld Device to accurately display your location, you must first calibrate the electronic compass. You should always calibrate the compass after you arrive at a new starting location, after periods of storage or after you install new batteries.
NOTE: Always calibrate the compass outdoors. Hold the compass level and away from objects that may generate magnetic fields, such as cars, buildings, or overhead power lines.
- From the main menu, select COMPASS > CALIBRATE. The compass screen appears.
- Rotate the Handheld Device 2-3 times in all three dimensions as shown below. Rotate until the black indicators are as close as possible to the center of the green zone. If successful, your Handheld Device will beep and vibrate, as well as, display a message that says your “CALIBRATION DATA HAS BEEN UPDATED SUCCESSFULLY.”
- NOTE: If you are unable to get the compass to automatically update your calibration data, follow the remaining steps.
- Rotate until the black indicators are as close as possible to the green zone and press the Menu Selection Pad to continue.
- At the prompt “DO YOU WANT TO SAVE THE NEW CALIBRATION DATA?” press the arrow keys to select YES.
- Press BACK to return to the main menu.
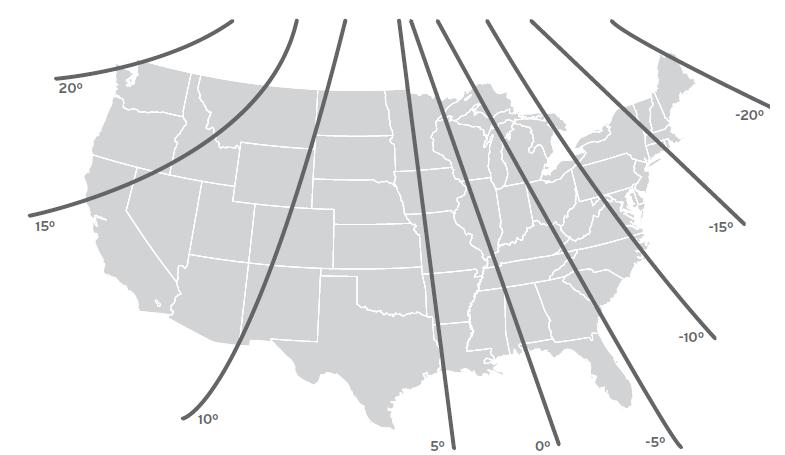
TO SET THE MAGNETIC DECLINATION ANGLE:
Magnetic declination is the angle between magnetic north (the direction the north end of a compass needle points) and true north. The declination is positive when the magnetic north is east of true north and negative when the magnetic north is west of true north. To find your exact declination angle go to:www.ngdc.noaa.gov/geomagmodels/Declination.jsp.
NOTE: Incorrect magnetic declination will result in inaccurate compass readings.
- From the main menu, select SETTINGS > GENERAL > MAG DEC ANGLE.
- Press the up or down arrows on the Menu Selection Pad to select the amount of declination. Magnetic declination ranges from -70 to 70. The default is 0.
- Press the right arrow when finished.
- Press BACK to return to the main menu.